I work across different machines with different versions of Word. On one machine, when I update the cross references in a document, they lose the character formatting I’ve loving applied to make them stand out from the regular text (blue italic, if you’re asking). This doesn’t happen on the other machines – I’m not sure what the difference is, probably the version of Word or the OS. However, I have found a way to force cross reference formatting to be sticky, and that’s the topic of today’s post. Continue reading “Broken cross references in Word: Part 3”
Tag: Word
Broken cross-references in Word: Part 2
I find the behaviour of the Cross-reference dialog in Word occassionally flakey. Opening the dialog and inserting a cross-reference works fine, but sometimes on the second, or third, or some-random-number-th insert, you start getting references to different content than you selected for no obvious reason. Usually, closing and reopening the dialog makes it behave itself. However, exasperation with this intermittent unreliability led me to adapt my process for inserting cross-references with page numbers to halve the number of times I used the dialog. The method I now use is also far more reliable in ensuring that both elements of the cross-reference are pointing at the same destination (if the page number reference is targetting the wrong place, that’s not at all obvious when you do a global update of references). Continue reading “Broken cross-references in Word: Part 2”
Broken cross references in Word: Part 1
Here’s one every tech writer encounters sooner or later (usually sooner): you’re writing a document in Word, you insert a handy cross reference to a section title, you keep editing, you update your cross references, and all of a sudden half of your document is a mess of repeated text all over the place – gah! Continue reading “Broken cross references in Word: Part 1”
Custom Ribbons in Word
I find it occassionally useful to drag some buried functionality in Word right up to the surface and add it to a ribbon so that it’s a click away instead of half a dozen clicks, 3 dialogs and 2 tabs away. And thanks to custom ribbons, I can!
To create a custom ribbon (checked against Word 2010 and Word 2013):
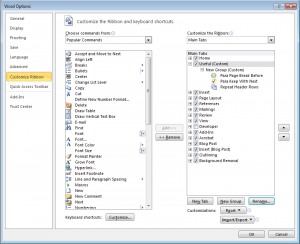
- Click File | Options, to open the Word Options dialog.
- Click Customize Ribbon in the left-hand panel of the dialog.
 Click New Tab below the tab list on the right-hand side of the dialog.
A new tab named New Tab (Custom) is added to the tab list, with a default group, New Group (Custom), nested below it.- To rename the new tab and the new group, select the tab/group entry, click Rename… below the tab list, enter a meaningful Display name on the Rename dialog and click OK.
Note: Word adds one group to a new tab by default, but you can add more by clicking New Group below the tab list. A divider appears between each group on the ribbon, and the group name appears below the ribbon buttons.
Next, the fun bit: adding commands! - In the right-hand panel, select the custom group to which you want to add one or more commands.
- Scroll through the list of commands in the left-hand panel, and for each one you want to add, select the command then click Add>>.
You can filter the list of commands using the Choose commands from drop-down list at the top of the left-hand list. I like to use the All Commands filter to make sure I don’t miss anything! 🙂 - Once you’ve got all the commands you want added, the final tweak is to arrange the tab, group and command positions to your liking by selecting each one and either dragging it up/down the list or clicking the Move Up/Move Down arrows.
- Click OK to save your new ribbon.
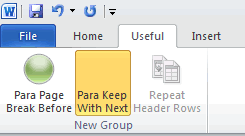
 Hey presto, your wonderful new ribbon is available at the top of Word every time you open it.
Notes: You can also customise Word’s default ribbons, and if you work on multiple machines and would like to use your customizations elsewhere, the Import/Export button on the Customize Ribbon screen of the Word Options dialog allows you to do just that.
Quick Text Generation in Word
Here’s a trick that comes in useful if, say, you have a blank Word doc you want to populate quickly to check out formatting and layout. A simple command will dump a block of sample text into your Word doc. You just type it in to the main document and press Return, no opening special dialogs or VB windows or anything.

